
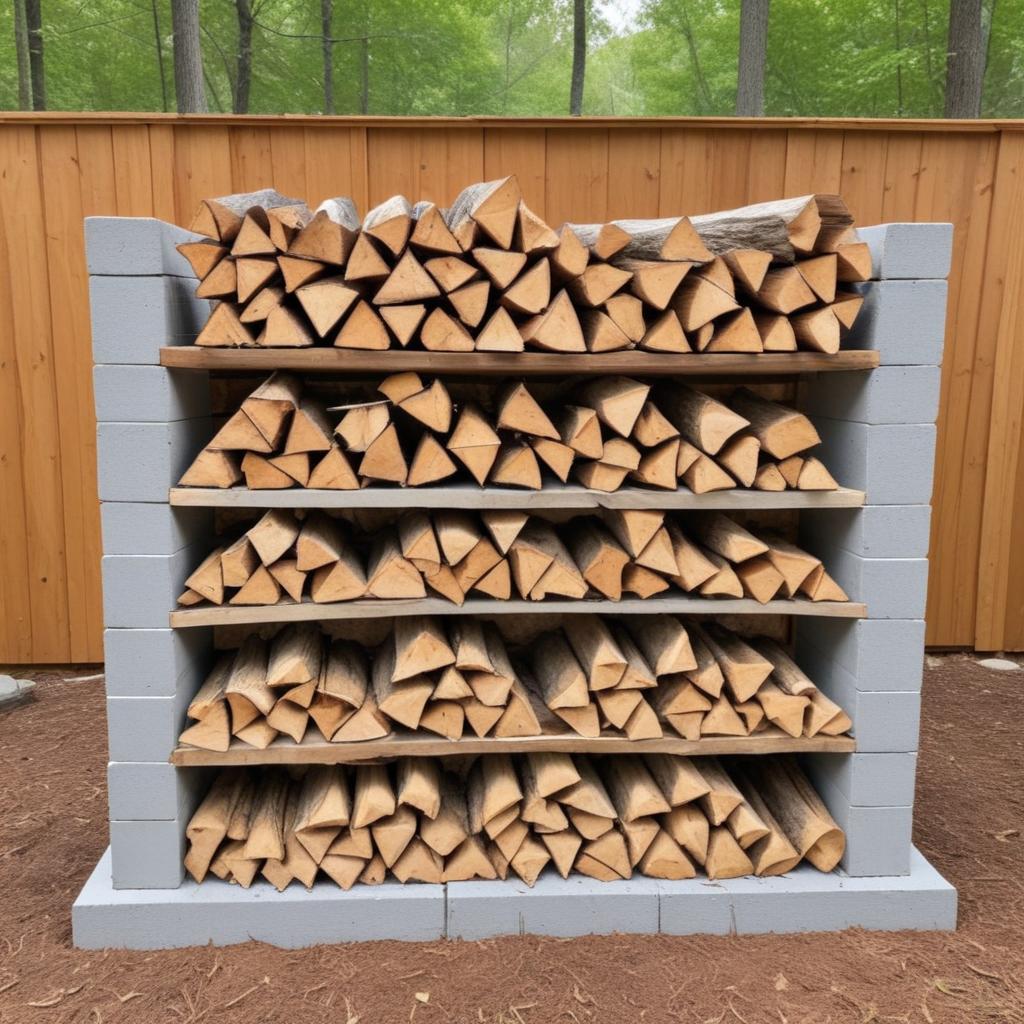
Building a firewood rack is a fantastic way to maximize your outdoor space, reduce wood hauling, and create a cozy gathering spot. While commercially made racks can be expensive, a DIY version offers a surprisingly affordable and customizable solution. This guide will walk you through the process of constructing a sturdy and functional V-shaped cinder block firewood rack, providing you with the knowledge and skills to create a beautiful and practical piece of outdoor furniture. It’s a project that’s achievable for beginners with a little patience and some basic carpentry skills. The payoff – a beautifully designed rack that keeps your firewood dry and readily accessible – is well worth the effort. Let’s dive in!
Understanding the Benefits of a Cinder Block Rack
Before we begin, let’s quickly consider why a cinder block rack is a worthwhile investment. Firstly, it’s incredibly durable. Cinder blocks are naturally resistant to rot and insects, making the rack a long-lasting solution. Secondly, they’re relatively inexpensive compared to other wood-based fire stations. Thirdly, they offer a rustic aesthetic that complements many outdoor spaces. Finally, they’re easily customizable – you can adjust the height and design to perfectly fit your needs and the space available. Consider the benefits for your family, your guests, and your overall outdoor enjoyment. A well-built rack not only keeps firewood dry but also adds a touch of charm to your yard.
Gathering Your Materials – The Foundation of Success
The key to a successful cinder block rack is careful planning and the right materials. Here’s a breakdown of what you’ll need:
- Cinder Blocks: Approximately 12-16 cinder blocks, depending on the desired height and width. Consider the size – larger blocks offer more stability, while smaller ones are easier to handle. Look for blocks that are relatively uniform in size for a more professional look.
- Mortar Mix: A high-quality mortar mix designed for masonry is crucial. It needs to be strong and able to withstand the weight of the blocks. Avoid using regular concrete mix.
- Level: A long, straight level is essential for ensuring the rack is perfectly level.
- Shims: Small wooden or plastic shims will help level the blocks and create a smooth surface.
- Measuring Tape: For accurate measurements and layout.
- Safety Glasses & Gloves: Protect your eyes and hands during construction.
- Optional: Wood Stain/Sealant: To protect the cinder blocks from the elements and enhance the aesthetic.
Constructing the Base – Laying the Foundation
The base of your rack is the most critical part. A solid, level base will prevent the entire structure from wobbling.
- Mark the Area: Determine the desired dimensions of your rack. A common size is 36 inches wide and 48 inches long, but you can adjust this to fit your space. Use a measuring tape and pencil to mark out the perimeter of the base.
- Prepare the Ground: Clear the area where you’ll be building the rack. Level the ground as much as possible. A slight slope can be beneficial for drainage.
- Lay the First Layer: Start by laying the first layer of cinder blocks directly on the prepared ground. Use a level to ensure each block is perfectly horizontal. Use shims to level any unevenness. This layer forms the foundation for the entire rack. Consider staggering the blocks slightly for added stability.
- Continue Building the Base: Repeat the process, adding more layers of cinder blocks, ensuring each layer is level and securely fastened to the layer below. A slight overhang is generally desirable for aesthetics and to prevent water from pooling. Remember to use a good amount of mortar mix between each layer.
Building the Vertical Supports – Creating the Structure
Once the base is established, it’s time to build the vertical supports that will hold the firewood.
- Mark the Support Points: Decide where you want the vertical supports to be placed. Typically, you’ll want to place them at intervals of 16-24 inches. Mark these points on the base with a pencil.
- Insert the Supports: Carefully insert the cinder blocks into the marked positions, using mortar mix to secure them. Ensure the blocks are plumb (perfectly vertical) using a level. This is a crucial step for structural integrity.
- Continue Adding Supports: Repeat the process, adding more vertical supports to create the desired height of your rack. Maintain consistent spacing between the supports. A good rule of thumb is to add a support every 12-18 inches.
- Reinforce the Corners: For added stability, consider adding corner braces to the vertical supports. These can be simple wooden blocks secured with mortar.
Adding the Top – Finishing Touches
The top of your rack is where you’ll place your firewood.
- Level the Top: Ensure the top surface of the rack is perfectly level. Use shims to adjust as needed.
- Consider a Cap: A cap made of wood or stone can help protect the top surface from the elements and add a decorative touch.
- Optional: Stain/Seal: Apply a stain or sealant to the cinder blocks to protect them from the weather and enhance their appearance. Choose a product that’s designed for masonry and suitable for outdoor use.
Variations and Customization
The design of your cinder block rack is entirely up to you. Here are a few ideas to consider:
- Different Block Sizes: Experiment with different block sizes to create a rack with a unique aesthetic.
- Decorative Elements: Add decorative elements like wood trim, painted blocks, or mosaic tiles to personalize your rack.
- Multiple Levels: Create a multi-level rack by adding additional vertical supports.
- Integrated Storage: Incorporate small shelves or compartments into the design to store firewood or other supplies.
Maintenance and Longevity
To ensure your cinder block rack lasts for years to come, regular maintenance is essential.
- Clean Regularly: Sweep or wash the rack periodically to remove dirt and debris.
- Re-Mortar: As the mortar begins to deteriorate, re-mortar the blocks to maintain structural integrity.
- Seal as Needed: Reapply sealant to protect the blocks from the elements.
Resources for Further Learning
There are many resources available to help you learn more about building cinder block firewood racks.
- YouTube: Search for “DIY cinder block firewood rack” – you’ll find numerous video tutorials demonstrating the construction process.
- Pinterest: Browse Pinterest for inspiration and ideas for decorating your rack.
- Online Forums: Join online forums dedicated to DIY projects to connect with other builders and share tips and advice.
By following these steps and incorporating your own creativity, you can easily build a beautiful and functional cinder block firewood rack that will provide years of enjoyment. It’s a rewarding project that combines craftsmanship with practicality. Enjoy the process and the satisfaction of creating a piece of outdoor furniture that’s built to last!