
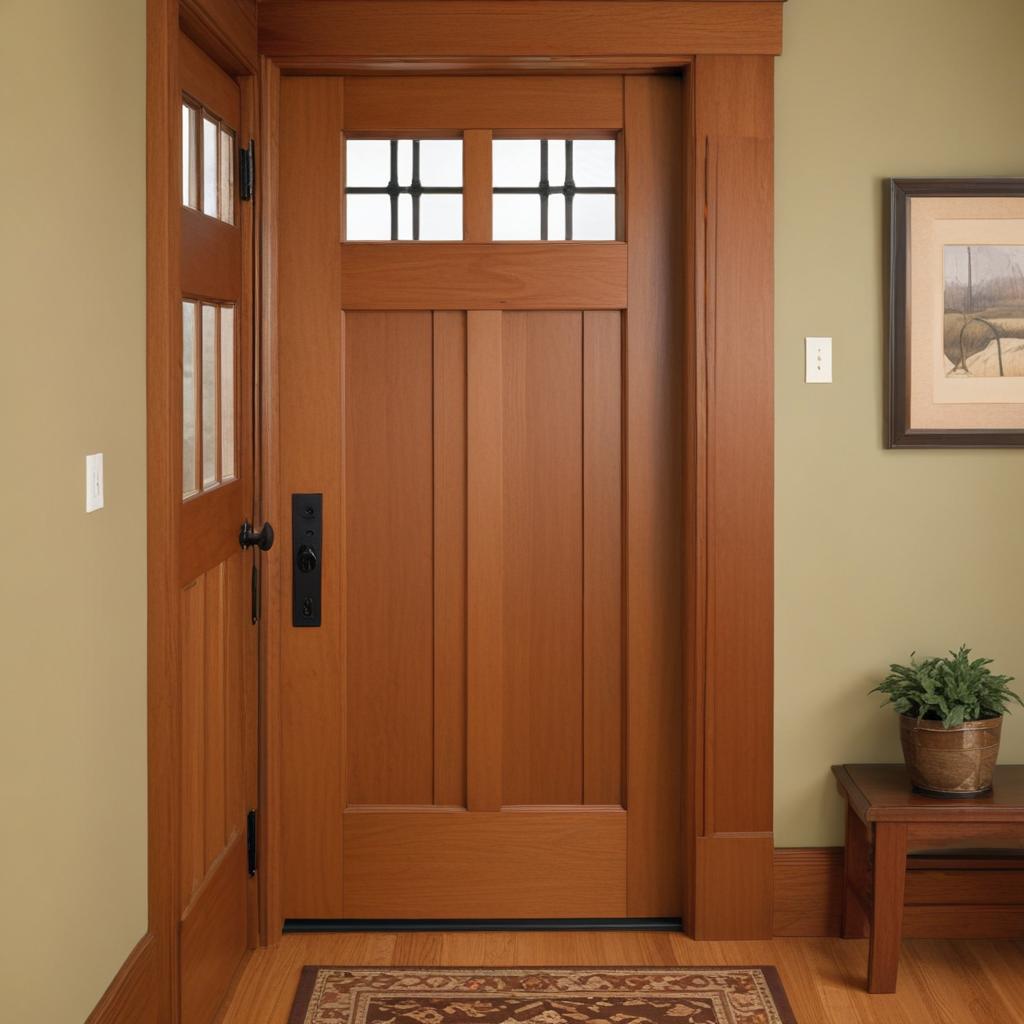
How to Create Craftsman-Style Door Trim – A Detailed Guide
For years, the allure of a classic, handcrafted aesthetic has captivated homeowners seeking a touch of timeless elegance. One of the most visible and impactful ways to achieve this is through door trim – the subtle detail that defines a room’s character and adds a layer of warmth and sophistication. While many homeowners attempt DIY projects, the true artistry often lies in understanding the nuances of a Craftsman-style trim, a design characterized by its generous proportions, slightly undulating edges, and a focus on natural materials and a deliberate, slightly imperfect appearance. This guide will walk you through the process of creating beautiful, authentic Craftsman-style door trim, offering practical advice and demonstrating how to achieve a look that’s both visually appealing and remarkably durable. It’s about more than just slapping on a piece of wood; it’s about embracing a specific aesthetic and investing in a design that will enhance your home for years to come.
Understanding the Core Principles of Craftsman Door Trim
Before diving into the construction, it’s crucial to grasp the fundamental elements that define a Craftsman-style trim. It’s not about perfectly straight lines or flawless finishes. Instead, it’s about a deliberate, organic feel. The key characteristics include:
- Generous Curves: The most recognizable feature is the undulating, slightly curved edges. These aren’t sharp, precise angles; they flow and soften, creating a sense of movement and depth.
- Overlapping Elements: Trim pieces often overlap each other, creating a layered effect that mimics the natural growth of wood. This isn’t about perfectly matching pieces; it’s about creating a visual rhythm.
- Natural Materials: Craftsmen favored the use of reclaimed wood, cedar, and pine. The trim is typically stained or painted in muted, earthy tones – browns, greens, grays, and even deep reds – to complement the wood’s natural beauty.
- Simple Joinery: Traditional Craftsman trim relies on simple, yet effective, joinery techniques like mortise and tenon, dovetails, and biscuits. These joints create a strong and stable connection between the trim pieces.
- Emphasis on Texture: The wood grain is often highlighted through careful sanding and the application of a natural finish. The goal is to showcase the wood’s inherent beauty rather than concealing it.
Understanding these principles will help you avoid common pitfalls and ensure your trim looks authentically Craftsman-inspired. Researching images of authentic Craftsman trim – both online and in books – is invaluable for visual reference.
Step-by-Step Construction: A Practical Guide
Let’s break down the process of creating Craftsman-style door trim into manageable steps. This guide assumes you’re working with a standard 3-inch wide board.
- Material Selection: Start with a good quality reclaimed wood. Cedar is a popular choice due to its natural resistance to moisture and decay, but pine can also be used, especially for a more budget-friendly project. Ensure the wood is properly seasoned – this will significantly impact the final color and stability.
- Cutting the Trim Pieces: Accurately measure and cut the trim pieces to the desired length. For a standard door, you’ll typically need at least three pieces – a base, a top, and a side piece. Consider the overall height of the door frame when determining the length of the trim. A slight overhang is common, adding to the Craftsman aesthetic.
-
Creating the Mortise and Tenon Joints: This is the most critical step. Carefully cut mortise and tenon joints into the base and top pieces of the trim. These joints are designed to be incredibly strong and will hold the trim securely in place. A good mortise and tenon joint requires precise cutting and careful alignment. A simple, but effective, method is to use a router with a dado blade to create a groove that will accept the tenon.
-
Assembling the Trim: Using wood glue and screws, assemble the trim pieces, ensuring the joints are tight and square. Don’t over-tighten the screws – this can strip the wood and weaken the joint. A slight gap between the trim pieces is desirable, contributing to the Craftsman’s organic feel.
-
Sanding and Finishing: Once the glue is dry, sand the trim thoroughly, starting with a coarser grit sandpaper and progressing to finer grits. This will create a smooth surface for staining or painting. Apply a natural stain or paint in a muted, earthy tone. Allow the stain or paint to dry completely before applying a protective finish, such as a clear polyurethane. A matte finish is often preferred for a Craftsman look.
-
Adding the Overlap: This is where the “flowing” aspect of the design comes into play. Carefully overlap the trim pieces, creating a layered effect. Use a small amount of wood glue to secure the overlap. Don’t strive for perfect alignment; the slight imperfections are part of the charm.
-
Detailing (Optional): Adding small decorative elements, such as simple grooves or raised edges, can further enhance the Craftsman aesthetic. These details should be subtle and carefully executed.
Beyond the Basics: Advanced Techniques
For those seeking a more advanced level of craftsmanship, consider exploring these techniques:
- Router Profiling: Using a router with a profiled bit can create a more pronounced curve in the trim, adding to the overall aesthetic.
- Wood Burning: Adding decorative details with wood burning can create a truly unique look.
- Applying a Natural Oil Finish: Instead of a polyurethane, consider using a natural oil finish, such as linseed oil, to further enhance the wood’s natural beauty and protect it from moisture.
Sustainability and Considerations
Choosing reclaimed wood is a great way to reduce your environmental impact. However, be mindful of the wood’s history – it may have been treated with chemicals. When possible, opt for wood that has been responsibly sourced and treated with minimal chemicals. Proper ventilation during sanding and finishing is essential to minimize dust and fumes.
Resources for Further Learning
Numerous resources are available to help you deepen your knowledge of Craftsman-style trim. Here are a few recommendations:
- The Spruce Crafts: https://www.thesprucecrafts.com/craftsman-door-trim-4177777
- Fine Woodworking: https://www.finewoodworking.com/craftsman-door-trim/
- YouTube Channels: Search for “Craftsman Door Trim” – you’ll find numerous tutorials demonstrating various techniques.
By following these steps and embracing the principles of the Craftsman aesthetic, you can create beautiful, durable door trim that will enhance your home for years to come.